
Follow Me On Social Media!

Say Goodbye to Bathroom Clutter with These Floating Shelves
Say Goodbye to Bathroom Clutter with These Floating Shelves
Say Goodbye to Bathroom Clutter with These Floating Shelves. If you often find yourself frustrated by the chaos that accumulates in your bathroom, you’re not alone. Many people struggle with limited space, misplaced items, and an overall lack of organization in one of the most personal areas of the home. Thankfully, floating shelves present a stylish and practical solution to these common woes. These chic additions allow you to showcase your favorite bath essentials, create a clean and open feel, and optimize every inch of available wall space. In this article, we’re diving deep into how to select, install, and decorate with floating shelves to transform your bathroom into a tidy oasis.
What Makes This Recipe Stand Out
Floating shelves serve as more than just storage; they act as an integral design element that can elevate the overall ambiance of the bathroom. Unlike bulky cabinets or cluttered countertops, floating shelves promote a minimalist aesthetic, which is crucial in smaller spaces. With a clean design, they allow light to flow through the room seamlessly, making it appear larger and more inviting.
Moreover, floating shelves provide a customizable storage solution tailored to your unique needs. Whether you use them to display luxurious bath oils, rolled towels, or plants, these shelves offer flexibility that traditional storage units cannot match. But beyond their practicality, floating shelves give homeowners the chance to express personal style. Select materials that resonate with your taste—be it rustic wood, sleek metal, or bright colors—and adapt the shelf to fit your bathroom’s theme.
Floating shelves also provide opportunities for enhanced functionality. You can use them to store everyday items within easy reach, or curate a display of decorative objects that reflect your personality. With so many options available, from wall-mounted designs to corner shelves, you can truly make your floating shelves a highlight of your bathroom décor. By the end of this article, you will have a well-rounded understanding of how to incorporate floating shelves effectively to say goodbye to bathroom clutter.
Ingredient Breakdown
Ingredients for Floating Shelves
- Floating shelf brackets: Essential for mounting your shelves securely and ensuring they can hold weight.
- Wood or materials for shelving: Choose from various options including solid wood, plywood, or even repurposed materials to align with your style.
- Wall anchors: Great for added stability if you’re mounting on drywall or if the shelves will bear heavy loads.
- Screws and drill: Required for assembling and installing the shelves safely.
- Level tool: Ensures your shelves are perfectly aligned and not tilted.
- Sandpaper and wood finish (if using wood): Helps to give a smooth finish and can add an attractive touch if you’re staining or painting the shelves.
When selecting materials for your floating shelves, the choice of wood or alternative materials is paramount. Solid wood, with its timeless appeal, provides strength and natural beauty, while plywood offers an economical option for a sleek look. Metal shelves can add contemporary flair and are ideal for modern or industrial-styled bathrooms. Wall anchors are crucial as they ensure that heavier items can securely stay in place without compromising the shelf’s structure. Lastly, don’t underestimate the importance of a level tool. Even the most stylish shelves can look disorganized if they’re not perfectly aligned.
| Element | Purpose |
|——————————|——————————-|
| Floating shelf brackets | Mounts shelves securely |
| Wood or materials for shelves | Main structural material |
| Wall anchors | Stability for heavy weights |
| Screws and drill | Assembly and installation |
| Level tool | Ensures proper alignment |
| Sandpaper and wood finish | Finishing touches |
Step-by-Step Preparation for Floating Shelves
Before diving into the installation process, it’s important to gather all necessary tools and materials. Having everything at your fingertips can save time and reduce the hassle.
Step One: Planning Your Space
Begin by assessing the wall space in your bathroom where you’d like to install floating shelves. Evaluate which wall provides the best visibility yet remains functional to prevent clutter from returning. Next, consider how high you want the shelves; they should be easily accessible while also avoiding obstructing any larger items like mirrors or cabinets. During this phase, sketching a simple layout can deeply clarify your vision and help you visualize how the shelves will look once installed.
Step Two: Gathering Materials
With your plan in hand, it’s time to gather all the materials you need. Ensure you have floating shelf brackets, the chosen shelving materials, wall anchors, screws, and your tools (like a drill, level, and measuring tape). Depending on your aesthetic preference, selecting the right finish for the shelves will enhance your bathroom’s style. For wooden shelves, consider if you want to stain or paint them to match or contrast with your existing decor.
Step Three: Installation
Once you have all the materials ready, it’s roll-up-your-sleeves time. First, find the wall studs to ensure that your shelves are supported adequately. Use your level tool to mark where each shelf will be mounted, making sure they are equidistant from the floor and one another. After confirming your marks, drill in the floating shelf brackets according to the manufacturer’s instructions. This is a crucial step, so ensure everything is straight before tightening the screws completely.
Step Four: Styling Your Shelves
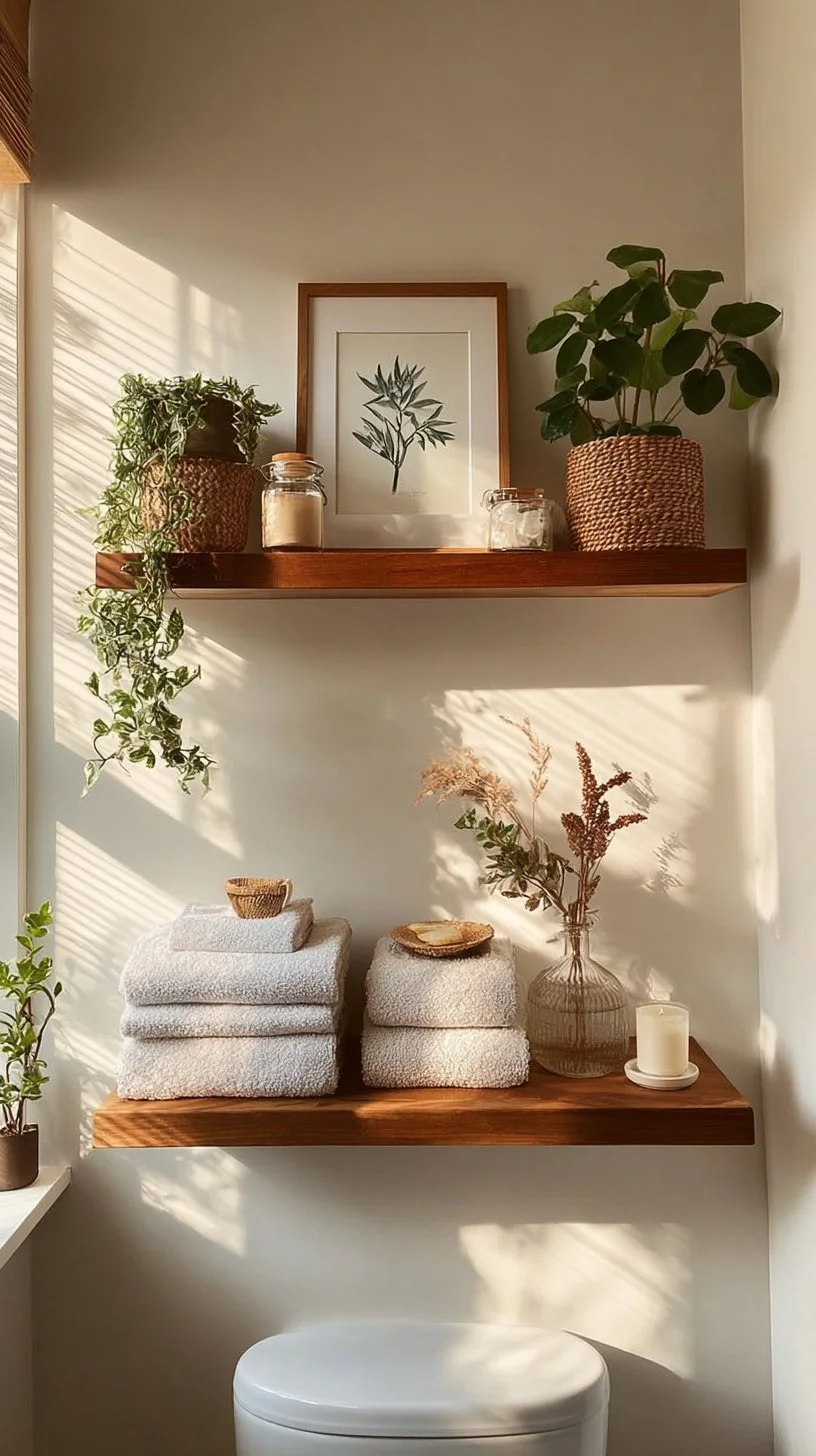
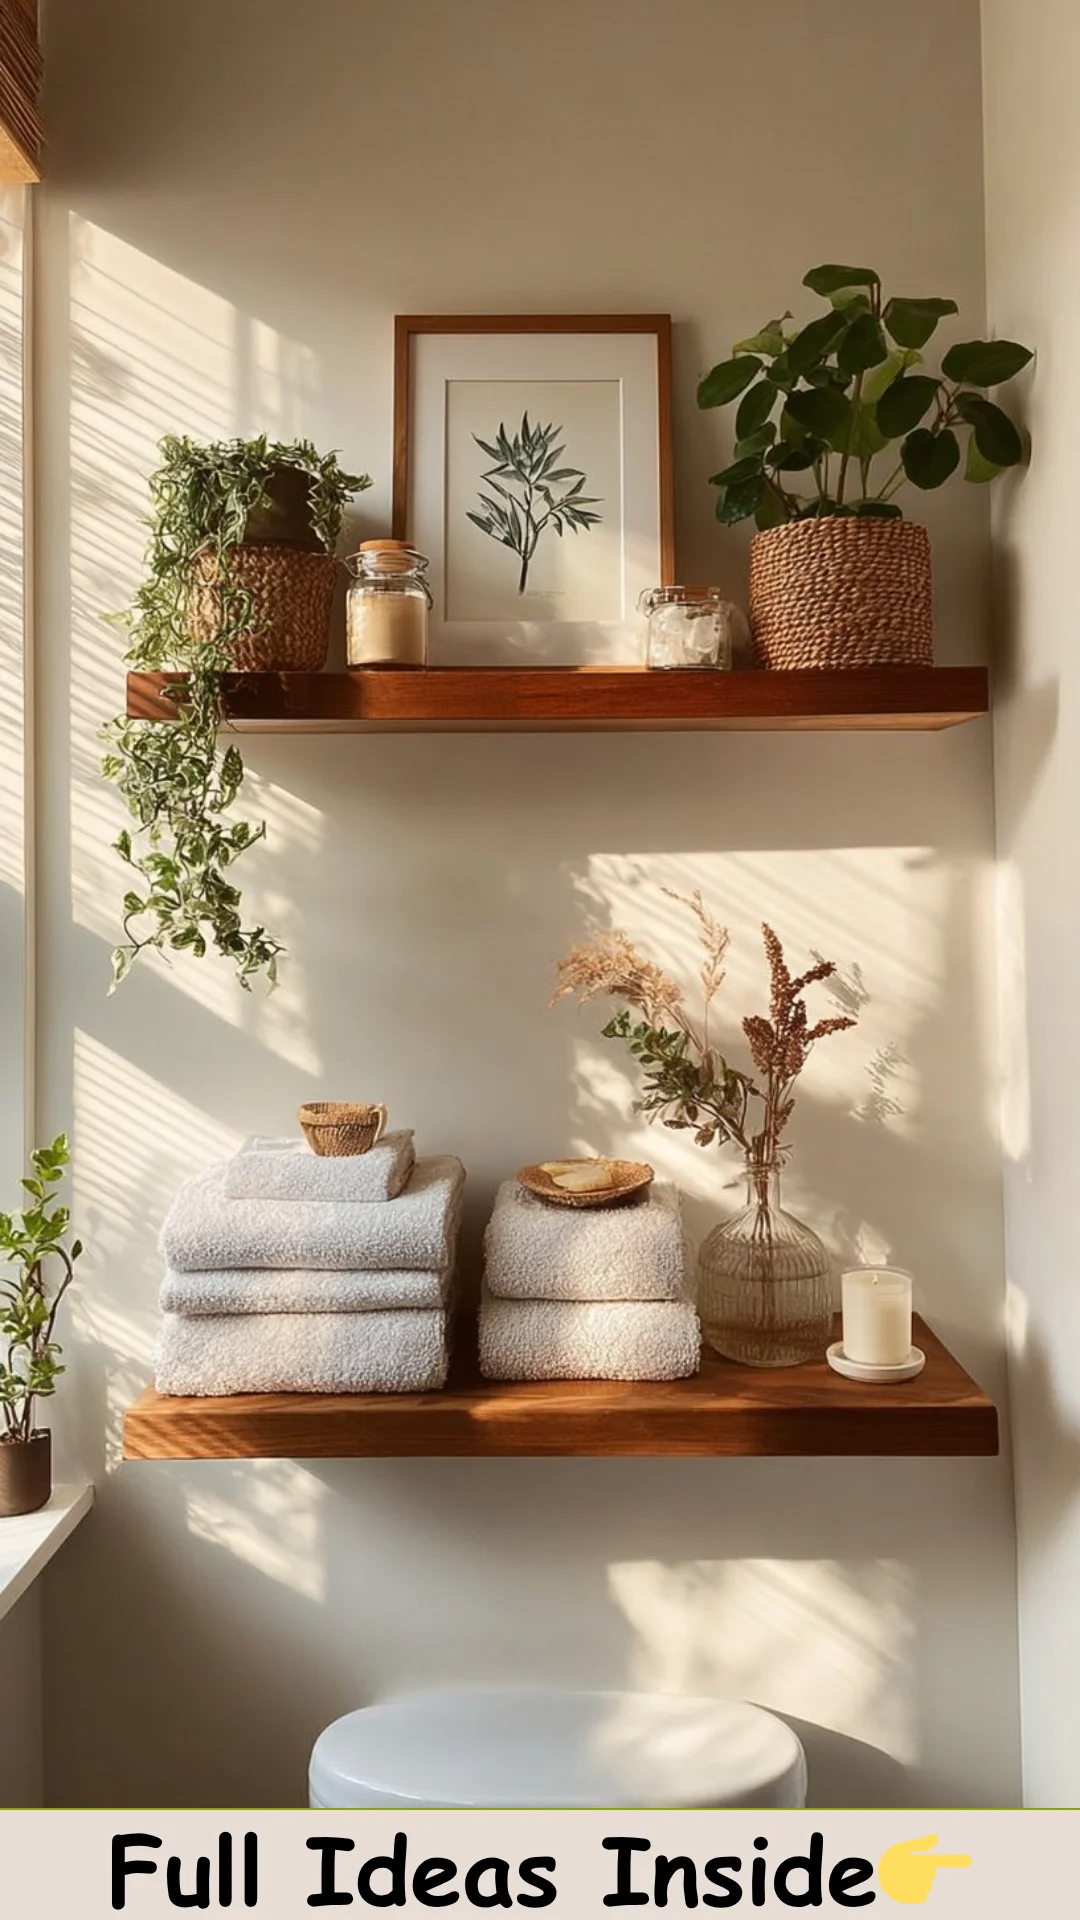
After the installation is done, it’s time to style your floating shelves. The beauty of these shelves comes from how you choose to display items on them. Start with larger items at the back, such as baskets for toiletries, and progressively layer smaller decorative items in front. Utilize plants or candles to bring in elements of nature and warmth that soften the bathroom’s aesthetic. Don’t shy away from mixing textures and heights for visual interest, creating a balanced look that draws the eye.
Full Cooking Directions —
Now that you’ve transformed your shelves, let’s walk through the full installation process. Selecting a location for your floating shelves is imperative. Ideally, you want to choose a wall near your sink or shower area for convenience. Once you’ve established the best spot, remember to clear the area of any decor or clutter around it to create a clean workspace.
Next, grab your drill and follow the previously mentioned steps to secure the brackets firmly into the wall. Double-check your measurements continually to avoid any mishaps with alignment. Once the brackets are installed, place the shelves gently on top, ensuring they are correctly secured in place before deciding the final positioning of your decorative items.
Finally, give your shelves a once-over to guarantee everything looks visually appealing. This stage is all about adding personal touches. Picture how each item contributes not just functionally, but to the overall mood of your bathroom. Don’t hesitate to rearrange items until your shelves feel just right.
Pro Tips & Extra Guidance
- Choose the Right Height: Ideally, floating shelves should be at least 60 inches high, but consider your household’s needs when positioning them.
- Weight Distribution: Avoid overloading shelves with heavy items to prevent sagging or damage.
- Combine Styles: If you’re using multiple shelves, mix and match their sizes to create an eclectic look.
- Secure Any Heavy Items: Use wall anchors for anything particularly heavy, like glass jars filled with cotton balls or towels.
- Seasonal Decor: Change decorative items seasonally for a fresh look throughout the year and keep your bathroom feeling inspiring.
- Regular Maintenance: Dust your shelves regularly to keep them looking pristine and remove any buildup that can happen in a steamy bathroom.
- Incorporate Lighting: Consider adding small fairy lights or LED strips to illuminate the shelves, adding warmth to the overall aesthetic.
Best Practices for Storing & Reheating
To maintain the appeal and functionality of your floating shelves, you must consider how to care for the items you place on them. Storing items in clear bins or beautiful baskets can keep the clutter contained while still showcasing your decorative choices. Place heavier items toward the back of the shelves to enhance stability, as improper weight distribution can lead to accidents.
When it comes to cleaning, use a gentle cleaner suitable for your shelf material. For wooden shelves, be careful not to use too much water, which can warp the wood over time. Regular dusting will help maintain the sleek look of your floating shelves while showcasing their potential as vibrant features in your bathroom.
In the event of a redecorating phase, be thoughtful in rearranging items rather than just removing everything. This approach can reinvigorate the space without the hassle of complete installations or deep cleans.
Common Questions Answered
How much weight can floating shelves hold?
The weight capacity can vary based on the brackets used and how well the shelves are installed, but generally, high-quality floating shelves can hold from 20 to 100 pounds.
Can I install floating shelves in a tiled bathroom?
Yes, you can install floating shelves in a tiled bathroom! Use a masonry drill bit to secure the brackets correctly.
How do I ensure my floating shelves stay level?
Using a level tool while installing is crucial. Always mark the wall with a pencil where brackets will be affixed to ensure everything is even.
What materials work best for bathroom floating shelves?
Water-resistant materials like treated wood, PVC, or metal are ideal to prevent damage from humidity.
Can I paint my floating shelves?
Absolutely! Painting or staining can personalize your shelves and help them match your bathroom décor.
Can I remove floating shelves without damaging the wall?
Yes, take care when removing screws and brackets. Patch the holes with spackle for a clean finish if needed.
What’s the best way to arrange items on floating shelves?
Start with larger items at the back and layer smaller ones in front. Incorporating variety in height and texture brings visual interest.
Final Thoughts + Call to Action
Say Goodbye to Bathroom Clutter with These Floating Shelves and embrace a more organized space that encourages relaxation and tranquility. With the proper installation and styling techniques, your floating shelves can become beautiful, functional pieces that reflect your personal style while elegantly decluttering your bathroom. Now that you have all the insights needed, it’s time to take action and transform your bathroom. Explore your options, gather your materials, and get started today! Your newly organized bathroom awaits!