
Follow Me On Social Media!

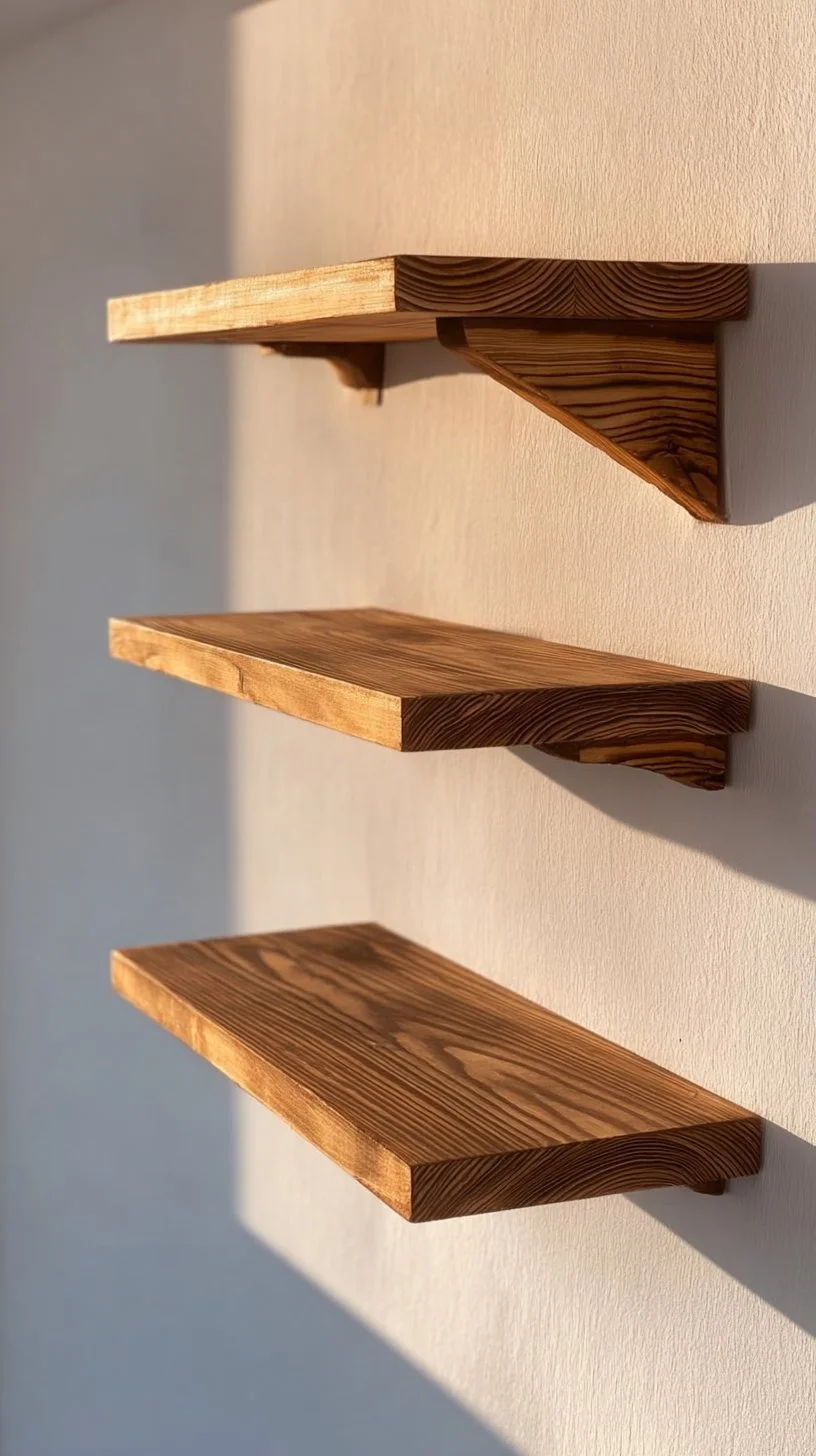
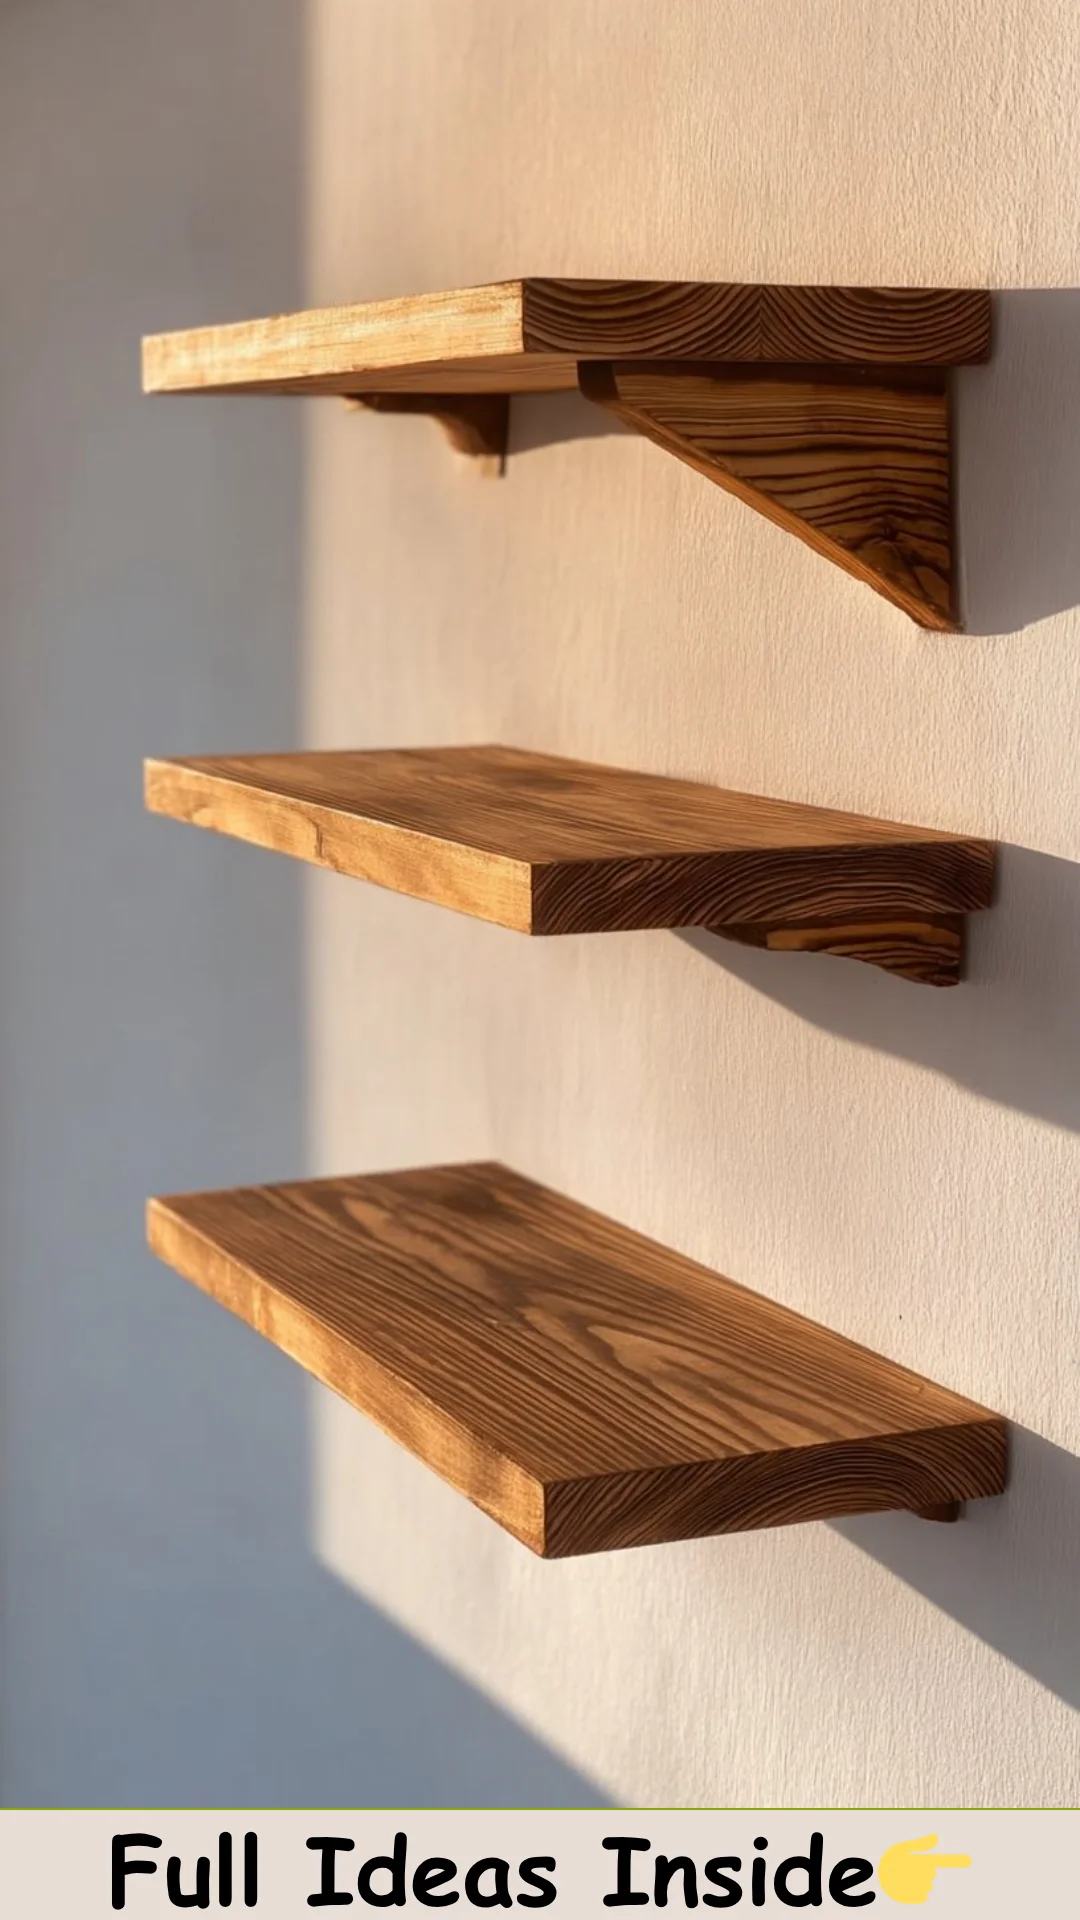
Upcycled Wood Shelf Ideas
Upcycled Wood Shelf Ideas
Upcycled wood shelf ideas open up a versatile and environmentally friendly avenue to not only showcase your creativity but also enhance your living space. Whether you aim to display treasured knickknacks or simply need extra storage, upcycling wood can add charm and character to your home. Just think about it: each shelf you create can tell a story, reminding you of the journeys that pieces of wood have taken before turning into beautiful furniture. This guide will delve into inspiring design ideas, practical tips for sourcing materials, and step-by-step transformation methods.
What Makes This Recipe Stand Out
Choosing to pursue upcycled wood shelf ideas is more than just a DIY project; it’s a means to embrace sustainable living while enriching your home décor. There are several emotionally and practically rewarding aspects to consider. First, upcycling allows you to give new life to discarded materials. Every piece of wood has its own unique history and texture—by using these materials, you are keeping them out of landfills, which positively impacts the environment.
On top of that, the character of reclaimed wood can elevate a room’s aesthetic, adding a rustic or vintage charm that new materials simply cannot replicate. The imperfections in the wood can also evoke warmth and comfort, making your space feel inviting. You can feel proud knowing that you are creatively expressing your personal style without relying on mass-produced furniture. Besides the emotional rewards, upcycling wood shelf ideas are also practical. You save money while gaining the satisfaction of creating something unique and useful. Furthermore, the process can be therapeutic; it engages your hands and mind creatively, resulting in a fulfilling project that you can genuinely call your own.
Ingredient Breakdown
When it comes to upcycled wood shelf ideas, the ingredients aren’t traditional food items. Instead, they consist of materials and tools crucial for creating your wooden masterpieces. Below is a tailored list of the essentials you’ll need:
- Reclaimed Wood: You can source this from old furniture, pallets, or construction sites. Ensure the wood is clean and free of harmful substances.
- Sandpaper: Various grades are necessary for achieving a smooth finish. Start with coarse sandpaper and progress to finer grades.
- Wood Stain or Paint: Choose colors that suit your home décor. Readily available finishes can also enhance or protect the wood’s natural beauty.
- Wood Glue: This will help reinforce joints and ensure the stability of your shelves.
- Brackets or Floating Shelf Hardware: Depending on your design choice, these are crucial for installation.
- Screws and Anchors: For securely attaching the shelves to your wall.
- Drill and Bits: A power drill will make holes for screws and brackets easier to manage.
| Tool/Material | Purpose |
|————————–|—————————————————————————–|
| Reclaimed Wood | Primary material for the shelves |
| Sandpaper | Smoothens and refines the surface of the wood |
| Wood Stain or Paint | Adds color and protects the wood |
| Wood Glue | Strengthens joints |
| Brackets or Hardware | Supports the shelves on a wall |
| Screws and Anchors | Ensures wall attachment stability |
| Drill and Bits | Facilitates attaching screws into wood and walls |
When selecting wood, look for pieces with contours, knots, and unique grains that can serve as focal points in your design. Each element plays a pivotal role in the look and feel of your shelves and, consequently, in the entire space they occupy.
Step-by-Step Preparation for Upcycled Wood Shelf Ideas
Step One: Gathering Materials
Before jumping into the fun part, the first step is to gather all necessary materials. Start by scouting for reclaimed wood; check out local salvage yards, flea markets, or even your garage for potential projects. When selecting wood, focus on obtaining boards that are relatively thick and sturdy. Next, make sure you have all your tools on hand, including sandpaper and your drill. This organized approach will save you time later, allowing your creative process to flow smoothly without unnecessary interruptions.
Step Two: Preparing the Wood
Once you’ve gathered your materials, the next step involves preparing the wood. Begin by cleaning the wood thoroughly to remove any dirt or debris. If the wood has old nails, use pliers to remove them carefully. Then, sand the surfaces using coarse sandpaper to eliminate sharp edges and rough patches. Progressively switch to finer sandpaper until it feels smooth to the touch. This is essential; properly prepared wood holds any finish better and feels pleasant when touched. You will surely be pleased with the finished result!
Step Three: Staining or Painting
After the wood is smooth, it’s time to apply a stain or paint. Choose a color that complements your décor, bearing in mind that darker stains often highlight the wood’s grain, while lighter paint can offer a brighter, airier feel. Apply the finish with a brush, ensuring even coverage. Allow the first coat to dry before assessing whether you need a second coat for richer color. Staining or painting is crucial not only for aesthetics but also for adding a layer of protection against scrapes and moisture. Your shelves will look beautiful while remaining functional!
Step Four: Installing the Shelves
Now that your pieces are stained or painted and dry, it’s time for installation. Start by determining the position of your shelves on the wall. Use a level to ensure that they will be straight when installed. Mark the spots for your brackets or floating shelf hardware using a pencil. If you’re using brackets, use a drill to make holes in the wall according to the anchors and screws you selected. Secure the brackets or hardware, then place your wood on top. Adjust as necessary to guarantee stability. Enjoy the beauty of your crafted shelves, filled with your favorite books and décor!
Full Cooking Directions —
After you’ve followed the detailed preparations, you can move into the final assembly of your upcycled wood shelves. As you attach your brackets to the wall, it’s essential to remember to use the level frequently. This prevents any wonky shelves that might cause decorations to tip over. Once installed, place a light piece of décor on the shelf to test its strength before loading it with heavier objects. The thrill of standing back and admiring your handiwork is genuinely rewarding. Keep in mind that custom, upcycled wood shelves not only serve a functional purpose but will become a cherished part of your home for years to come.
Pro Tips & Extra Guidance
To enhance your upcycled wood shelf projects, a few nuanced tips can significantly improve the outcome. First, consider mixing wood types; combining different grains offers a stunning visual contrast and attracts the eye. For a more rustic touch, you can leave some nails or imperfections in the wood; they create a charming patina that adds personality. Additionally, if you find this project enjoyable, consider branching out into more complex designs like corner shelves or multi-tiered arrangements.
If your wood is particularly rough, you might want to explore whitewashing techniques or even stenciling for added designs. Don’t be afraid to let your creativity lead you; each imperfection tells a story, thus making your shelves unique.
Best Practices for Storing & Reheating
When it comes to caring for your new shelves, employ a few best practices to ensure they stay in excellent condition. First, regularly dust the surfaces; this maintains their beauty and prolongs the finish. For deeper cleaning, a damp cloth followed by a dry one can effectively lift any dirt without damaging the finish.
If you opt for painted shelves, avoid exposing them to extreme moisture or heat, as this can impair the finish. When storing items on your new shelves, arrange heavier items toward the bottom to prevent tipping.
For those using reclaimed wood, it may expand or contract slightly in humidity changes; make sure the installation allows some flexibility. Regularly check the brackets and screws to ensure they remain secure over time, providing peace of mind that your shelves will continue to serve their purpose for years.
Common Questions Answered
What types of wood are best for upcycling?
When selecting wood for projects, reclaimed barn wood, pallets, and furniture scraps are excellent choices. Look for dense hardwoods like oak or maple, as they offer durability while showcasing beautiful grains.
Can I use new wood instead of reclaimed?
Yes, new wood can be used, but it won’t carry the same charm as reclaimed materials. If you prefer using new wood, consider distressing it to achieve a rustic look.
How do I prevent wood warping?
To prevent warping, apply a sealant to new wood to protect it from moisture changes. Additionally, store wood in a climate-controlled environment prior to use.
Can I paint over stained wood?
Yes, painting over stained wood is possible but may require a primer. Lightly sand the stained surface for better adhesion before applying the primer and paint.
What tools will I need for the project?
Essential tools include a drill, drill bits, sandpaper, a saw (if you need to cut the wood), measuring tape, and a level for installation.
How can I create a floating shelf?
To create a floating shelf, consider using hidden brackets. Several types are available that install in the wall, allowing the wood to appear as though it’s floating.
How do I style my shelves once they are installed?
Styling your shelves can be as simple as grouping items in odd numbers, mixing textures, and varying heights. Consider stacking books, adding greenery, or displaying art to breathe life into your shelves.
Final Thoughts + Call to Action
In exploring upcycled wood shelf ideas, you’ve engaged in a project that embodies creativity, sustainability, and practicality. More than just a decorative touch, your shelves tell a story and showcase your personality. Now it’s your turn to dive into this rewarding experience; grab your materials and let your creativity flow. There’s no limit to what you can create with upcycled wood—each shelf can reflect your unique style while benefiting the environment. Embrace the adventure today!